 Latest images
The mad thrash begins...
3 posters
:: General Forum :: General Talk
Page 1 of 1

The mad thrash begins...
![]() Kz900jim 28th April 2011, 5:38 pm
Kz900jim 28th April 2011, 5:38 pm
I sent the wife out of town for her BDay with her friends.. I now have till Monday to get the following done on her SV present.
Front & rear rubber
fork seals and emulators
rear rotor and pads
sprockets and chain
bars and mirrors
grips and bar ends
gas cap
frame sliders
I have all the parts.. and its go time....
Here is a pic of the sprocket I had made for her...

Let the fun begin!!
Front & rear rubber
fork seals and emulators
rear rotor and pads
sprockets and chain
bars and mirrors
grips and bar ends
gas cap
frame sliders
I have all the parts.. and its go time....
Here is a pic of the sprocket I had made for her...
Let the fun begin!!

Kz900jim- Posts : 69
Join date : 2010-11-08
Age : 57
Location : West Covina, CA -

Re: The mad thrash begins...
![]() tazkat 15th May 2011, 7:59 pm
tazkat 15th May 2011, 7:59 pm
Are you done yet?? It is getting late on Sunday!
tazkat- Moderator
- Posts : 31
Join date : 2010-11-03

HS2020- Admin
- Posts : 67
Join date : 2010-11-01
Age : 52
Location : Nashville,TN -
Re: The mad thrash begins...
![]() Kz900jim 15th May 2011, 10:44 pm
Kz900jim 15th May 2011, 10:44 pm
After its date with the pressure washer...


Friday..
Front wheel and forks removed. Forks dissembled and cleaned ready for reassembly, the front wheel is off to get new rubber..
Saturday..
Forks reassembled with emulators.. galfer rear rotor arrived today too... and the sliders.


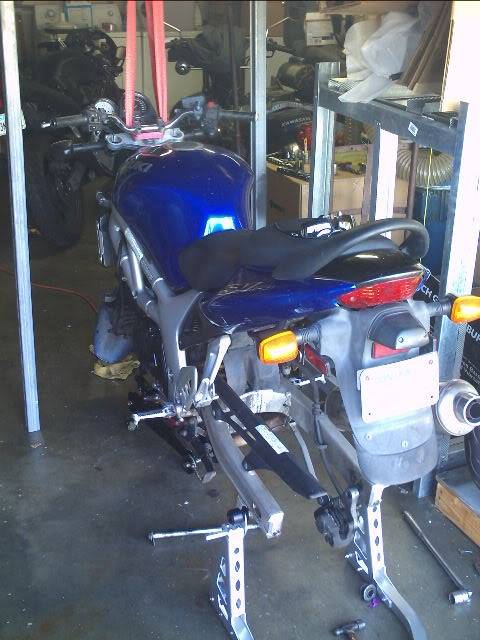
In process..
OK here it is, forks off and the rear wheel getting new rubber.
Now for the Tech portion of the thrash...
The reassembly of the forks as you all know require getting the upper bushing back into the lower leg which is a PITA.
My easy low-buck solution... a 16" piece of 2" PVC. cut one end to look like this..

Leave the other end the way it is...
Slip the cut end over the assembled upper tube that is in the lower leg, squeeze the two 'fingers' in so they fit into the lower leg against the washer and tap the other end with a hammer until the bushing is in the lower leg and the washer is seated against the lower leg. Now put the seal in and repeat the process tapping the seal in, now slip the dust seal on, and use the other end to seat the dust cover in the same manner, the 2" o.d. of the tube is almost the same diameter of the lower leg and will seat the dust cover perfectly.
Sunday.. (she comes home Monday)
All back together. I had a run in with the rear caliper on Sat.. the back brake felt 'soft' when i test rode it.. and the rotor was worn funny.. one piston was froze solid. Luckily the shop down the street had an '04 650 they were parting out.. problem solved, installed the new caliper and bled it out and its all good.
New EK chain installed along with the new c/s sprocket. New gas cap, levers.


I did ride it around a bit, the emulators made huge difference in the front end. The rear is weak for my tonnage but I have a B12 shock that might find its way into the back... but that's another day...
I ended up recovering the seats too, the front had a crack so it needed it any way... took about 2 hours and the came out great. The rest of the time was spent with some mothers polish for the chrome and some armor all on the plastic to get it looking black again.

D-Day... Monday afternoon...
She LOVES it!..... Tears and all... She had spent 2 months planning her bday in San Fran with her friends and it all fell apart as soon as the wheels touched down up there...
This made it all better for her...


Friday..
Front wheel and forks removed. Forks dissembled and cleaned ready for reassembly, the front wheel is off to get new rubber..
Saturday..
Forks reassembled with emulators.. galfer rear rotor arrived today too... and the sliders.
In process..
OK here it is, forks off and the rear wheel getting new rubber.
Now for the Tech portion of the thrash...
The reassembly of the forks as you all know require getting the upper bushing back into the lower leg which is a PITA.
My easy low-buck solution... a 16" piece of 2" PVC. cut one end to look like this..
Leave the other end the way it is...
Slip the cut end over the assembled upper tube that is in the lower leg, squeeze the two 'fingers' in so they fit into the lower leg against the washer and tap the other end with a hammer until the bushing is in the lower leg and the washer is seated against the lower leg. Now put the seal in and repeat the process tapping the seal in, now slip the dust seal on, and use the other end to seat the dust cover in the same manner, the 2" o.d. of the tube is almost the same diameter of the lower leg and will seat the dust cover perfectly.
Sunday.. (she comes home Monday)
All back together. I had a run in with the rear caliper on Sat.. the back brake felt 'soft' when i test rode it.. and the rotor was worn funny.. one piston was froze solid. Luckily the shop down the street had an '04 650 they were parting out.. problem solved, installed the new caliper and bled it out and its all good.
New EK chain installed along with the new c/s sprocket. New gas cap, levers.
I did ride it around a bit, the emulators made huge difference in the front end. The rear is weak for my tonnage but I have a B12 shock that might find its way into the back... but that's another day...
I ended up recovering the seats too, the front had a crack so it needed it any way... took about 2 hours and the came out great. The rest of the time was spent with some mothers polish for the chrome and some armor all on the plastic to get it looking black again.
D-Day... Monday afternoon...
She LOVES it!..... Tears and all... She had spent 2 months planning her bday in San Fran with her friends and it all fell apart as soon as the wheels touched down up there...
This made it all better for her...
Kz900jim- Posts : 69
Join date : 2010-11-08
Age : 57
Location : West Covina, CA -
Re: The mad thrash begins...
![]() tazkat 16th May 2011, 8:07 am
tazkat 16th May 2011, 8:07 am
Way to go Jim! When Momma is happy the world is a good place to live LMAO
tazkat- Moderator
- Posts : 31
Join date : 2010-11-03
Re: The mad thrash begins...
![]() HS2020 16th May 2011, 7:06 pm
HS2020 16th May 2011, 7:06 pm
Good job on making her happy. Bike looks good to.
HS2020- Admin
- Posts : 67
Join date : 2010-11-01
Age : 52
Location : Nashville,TN -
:: General Forum :: General Talk
Page 1 of 1
Permissions in this forum:
You cannot reply to topics in this forum|
|
|